Which is probably the most optimal PHP based mostly framework available for sale nowadays? If laravel Development services are exactly what came to your thoughts, you are just right! And contains to be, since it has the prospective to create the fantastic custom web applications. This is exactly what the micro, medium and small businesses look for. It really is simple. It really is fast. It gets the least scope to be wrong.
Laravel development services in India invigorate businesses by providing scalable, efficient solutions tailored to unique needs. Leveraging the power of this versatile PHP framework, businesses experience accelerated development cycles and enhanced performance. With a skilled workforce adept at harnessing Laravel’s capabilities, companies gain a competitive edge through streamlined processes and robust web applications. By capitalizing on the expertise and innovation offered by Indian developers, businesses witness significant boosts in efficiency, productivity, and overall success.
If you’re looking for web Development or an e-com website for the startup, you will need something that offers you more teeth to bite. You will want web design services that not merely satisfy your unique needs. Actually, you will need a Framework, which satisfies numerous needs. Well, alaravel Development Services in India is with the capacity of doing this.
So, why is Laravel Development Services in India the best option for you yourself to boost your Business?
Outrageous Popularity (Laravel Development services in India)
You don’t desire to be in times where you search for change in your online application and you also lack assets while generating those changes. A lot the more options you obtain, the simpler it gets for you yourself to deliver. In the end, any eCommerce website design service provider will deliver the best answers to their customers. The solutions usually are advantageous for firms. Tell us how laravel can provide this for you.
Laravel is among the most trending & most popular frameworks on the market. What it could do for you personally is that you will get the help of a residential area of laravel Developers. Thousands of skilled and innovative web designers can resolve your issues anytime and anyplace. It even offers excellent paperwork amongst numerous php frameworks. This assists your developers to utilize and find out about various laravel components.
Amplified Performance
One of the better marketing approaches for any business will be promoted through person to person. Person to person publicity can perform wonders for just about any company. A Laravel development company would like to boost the business of its clients to gain a reputation. Laravel allows overall performance enhancement from the built apps. The performance from the apps developed will be faster. Actually, the development of the apps also requires a lesser timeframe. In short, it could easily add versatile features to an application.
Laravel Development Services in India supports many caching systems like Memcached and Redis natively. What it could do is, it could amplify the performance from the apps built deploying it. In fact, you can even configure several caching systems in Laravel. Laravel does indeed give you more teeth to bite! Its document cache driver stores various cached objects within the file system. Thus giving you a chance to develop applications rapidly. The faster you build the app, trigger faster revenues.
Simplified Authentication
An owner of the web application would like to make sure that the users are usually genuine. That’s, the users are in fact who they claim to be. You’ll want to keep carefully the unauthorized users from gaining usage of paid resources. Laravel makes the execution of authentication simpler. While providing a seamless solution to organize logic, in addition, it provides from the box configuration. You can even have to control the usage of resources. This makes certain that unauthorized users stay distant from their own valuable resources.
Rigorous Security
When you own an e-com business where all of your resources and privacy of the client data reaches risk. Your organization needs a risk-free system. Laravel is really a highly secure system. It provides strenuous security against many threats. One’s body is secure against risks such as for example SQI injections and cross-site forgery demands.
Your codebase is also remarkably guarded. This enables your online app to execute seamlessly without security threats. It can help in reducing the chance factor. This is actually the main aim of any Laravel development company.
Time is Money
The web application development using Laravel is simpler and faster. It generally does not need development using complex codes. The best of laravel is a MVC framework. This gives the entire needed infrastructure, which needs for building websites. Therefore it also saves an ample amount for development. On a regular basis spent in Designing, templating, configuration security, etc, might have a productive use. The additional time you save or use productively; it eventually results in higher revenue generation.
Attract more Audiences
The assistance to offer laravel Development companies is wide-spread. Among the great things about a laravel Web development is that it empowers you for developing a multilingual application. By causing the most from the laravel framework that is achievable. Moreover, when you yourself have a multilingual app, you’re liable to reach more amounts of people with ease. Actually, the app is a feature and scalable. In addition, the technology does apply to any browser or device. This may attract increased traffic towards your business web app.
Traffic Management
It’s true that your online app will attract increasingly more traffic someday or even today. Now, the more traffic a web app gets, the more are the number of requests it requires to take care of every second. This implies that the hosting of the application will undoubtedly be costly. Sometimes even the webserver can go wrong with data loss. You don’t desire to be in this example!
Laravel Development Services in India is among the best solutions for increasing the revenues of your business. It requires extremely less time for the development of a web app using Laravel. Development using laravel is simple and fast. The number of developing options you obtain due to its astounding popularity. Whenever your web app is capable of doing faster with endless complex features with simplicity, it really will attract more amount of users. The security features and the lucid traffic management will be the supreme requirement of any growing business today. All these gel up together with each other to improve your earnings
Developing an eCommerce online store that caters to a wide audience and provides an excellent shopping experience for everyone requires careful planning and execution.
Our eCommerce web and app development services offer tailored digital solutions to meet your specific needs and sore your brand. Our expert eCommerce team of designers and developers utilizes cutting-edge technologies to create responsive, user-friendly websites and mobile applications. We focus on enhancing user experiences, ensuring seamless functionality across devices, and optimizing for performance. Whether you need a stunning eCommerce website or a feature-rich mobile app, we’re here to bring your vision to life and help you succeed in the digital world.
ecommerce development services
Here are steps and strategies to help you create a better online store:
1.Market Research and Target Audience:
Start by conducting thorough market research to understand your target audience, their preferences, and pain points.
Identify niche markets or underserved customer segments that you can cater to.
2.Hire an Agency to Create an Online Store: There are thousands of eCommerce provider agencies, but my recommendation is IOGOOS Solution. IOGOOS Solution is an award-winning eCommerce web & app development agency, and certified eCommerce agency partner with Shopify, Adobe Commerce, and Prestashop. IOGOOS Solution is also a WordPress VIP agency and developed thousands of highly customized eCommerce websites. IOGOOS Solution creates attractive and functional eCommerce websites and mobile app that encourages customers to explore and find products easily. They ensure that the design aligns with your brand identity, and increase ROI by tested digital marketing strategy.
User-Friendly Design:
Ensure a clean and intuitive design that’s easy to navigate.
Implement responsive design to make your store accessible on all devices, including mobile phones and tablets.
3.Accessibility:
Make your store accessible to people with disabilities. Ensure compliance with accessibility standards like WCAG (Web Content Accessibility Guidelines).
4.Mobile Optimization:
Optimize your online store for mobile devices, as a significant portion of users shop from smartphones.
5.Fast Loading Speed:
Improve page load times to reduce bounce rates and improve the user experience. Compress images, use content delivery networks (CDNs), and minimize HTTP requests.
6.Search Functionality:
Implement a robust search feature with filters and auto-suggestions to help users find products quickly.
7.High-Quality Product Images and Descriptions:
Provide clear, high-resolution images and detailed product descriptions.
Include customer reviews and ratings to build trust.
8.Secure Payment Processing:
Ensure that your payment gateway is secure and supports various payment methods.
Display security badges and trust signals to reassure customers.
9.Personalization:
Use customer data to personalize the shopping experience. Recommend products based on past purchases and browsing history.
10.Easy Checkout Process:
Keep the checkout process simple and minimize the number of steps.
Offer guest checkout options to reduce friction for first-time buyers.
11.Customer Support:
Provide multiple channels for customer support, such as live chat, email, and phone.
Be responsive and helpful in resolving customer inquiries and issues.
12.Shipping and Returns:
Communicate shipping costs, delivery times, and return policies.
Offer multiple shipping options, including express and free shipping if feasible.
13.SEO Optimization:
Optimize your site for search engines to improve visibility and attract organic traffic.
Use relevant keywords in product titles, descriptions, and meta tags.
14.Content Marketing:
Create informative and engaging content, such as blog posts, videos, and buying guides, to educate and engage your audience.
15.Social Media Integration:
Promote your products on social media platforms.
Enable social sharing buttons on product pages to encourage user-generated content.
16.Analytics and Testing:
Use analytics tools to track user behavior and identify areas for improvement.
Conduct A/B testing to optimize various elements of your website, such as CTAs and product page layouts.
17.Scalability:
Build a scalable infrastructure that can handle increased traffic and sales as your business grows.
18.Feedback and Iteration:
Listen to customer feedback and continuously iterate to improve your online store.
19.Legal Compliance:
Ensure your store complies with all relevant laws and regulations, including data protection and consumer rights.
20.Marketing and Promotion:
Develop a marketing strategy that includes social media advertising, email marketing, and other promotional tactics to attract and retain customers.
Remember that building a successful eCommerce store is an ongoing process. Regularly monitor and adapt to changes in the market and customer preferences to stay competitive and provide the best possible experience for everyone.
For more detail, you can drop a email : ino@iogoos.com or Contact us
While working on multiple projects I always need to copy the current path of a directory in Terminal. I used to use the command pwd in the terminal that prints the current directory path in the terminal and then I have to select the path with the mouse to copy and paste the same where I needed.
I hate to use the mouse as it wastes a lot of time and to save time and copy the current path without selecting it with the mouse, I found this command and use it all the time.
pwd | pbcopy
This command will copy the current directory path to the clipboard and we can then press CMD+V (CTRL+V for Windows) to paste the path wherever needed.
I hope this will help someone save time and be more productive.+
Website Design Services
Revamp your online presence with our top-notch website design services! Elevate your brand and capture your audience’s attention with stunning, responsive designs tailored to your unique needs. Our skilled team blends creativity with functionality, ensuring a seamless user experience that drives results. From eye-catching visuals to user-friendly navigation, we prioritize every detail to make your website stand out. Let us transform your vision into a captivating digital reality. Contact us today for expert website design services that leave a lasting impression. Your success is our priority!
Let’s have a quick call to discuss our approach develop website.
One of the most burning questions in today’s situation is how to run an e-commerce business online, and how to help a Shopify Developer run a compatible channel. E-commerce is often used to denote the sale of physical products online, but it can also be described as any kind of commercial transaction facilitated via the Internet. While e-business refers to all aspects of running an online business, e-commerce only refers to transactions in goods and services. Traders and consumers say that buying a rug from an online retailer leads to online sales. Dropshipping allows you to avoid any contact with the goods sold, as you are solely responsible for your e-commerce marketing tactics.
You can take help from the Shopify platform to target people who go online. There is no need to open a brick-and-mortar shop (roadside business), as you never need a security guard. An e-commerce store allows you to attract people like you who may have a strange work schedule or do not have the time to shop in person.
Automate your business by hiring Shopify Developer
If you want to automate your business and you have Shopify Experts, you can set up a website with the help of the best and professional web design services where small businesses can create their ads using templates. Now what I wanted to talk about is the design and layout of the homepage, which can really help make your online business a success. Even if it doesn’t fit your business’s positioning and profit margin, or if you’re not in an e-commerce business, it can still offer other things. An e-commerce expert or Shopify Developer provides guidance that will help you make essential design decisions to create a great e-commerce UX that is professional, attractive, and user-friendly which keeps visitors coming back.
First, an entrepreneur should decide what services they will offer and try to think about how you can develop an e-commerce strategy that rewards your existing customers and makes them come back. Once you have implemented your e-commerce strategy in your business, consider what you can offer your customers regularly. A professional Shopify Development Company has all plans and strategies. Do consult once.
Once you know how to improve your customer’s lives, this is the best way to start your online store. Identify the problems your product solves and if you can sell your personal products on your e-commerce site, which can make a visible difference in the lives of your customers, then you have a head start.
With drop shipping e-commerce, you can add new products to your business without worrying about shipping products or keeping an inventory, allowing you to grow quickly. Work with a trusted supplier who delivers items directly from the warehouse or sells through your own eCommerce website or social media.
Fringe advantages of Ecommerce website
Another advantage of e-commerce is the ability to capitalize on impulse purchases, as online shoppers are more inclined to participate. Customers have individual needs when it comes to payment methods and can cancel potential sales if they cannot pay as they wish on your e-commerce site. By informing themselves about sales and promotions and asking questions during the shopping experience, some customers may prefer online shopping because it is a little less invasive and makes it more convenient for them.
An eCommerce Expert create a website is a fairly straightforward and fast process, and you can develop an online site in just a few hours or even days with the help of an expert Shopify Developer.
You can start your online business this way, and the platform is simple and cheap to use, whether you use it yourself or hire an e-commerce Shopify Development Company. Another advantage of the website builder is that it provides you with tools to guide you in scaling your website and saving it. If your e-commerce site doesn’t respond to mobile web apps, you’re missing a great opportunity.
If you have had an online store for some time or are just beginning your e-commerce adventure, you will succeed if you can attract customers to your e-business. Partnering with a Shopify Developer who understands your business, market, and customers is essential to the success of your website. Note the importance of the FAQ page when you are developing your own e-commerce site so that it can make your site more relevant to customers and their needs. FAQ pages increase sales, but the first step is that which one must not be glossed over.
Add great product photos and product descriptions to influence customer selection, and when buyers successfully find the product they want, they should find it. In an e-commerce store, you can target people who put products in your cart but don’t buy them, those who never buy them, and those who visit your blog posts. That’s why it is much essential to take a guide from the best Shopify Development Services Provider.
Each option has its own advantages and disadvantages, and while there is no single – size – fit that work perfectly for everyone, we believe that any company that is really serious about e-commerce should have its own website. We have collected the best tips and tricks for building web flow to show you that it is the right platform for your company’s websites, regardless of what products you offer. If you run a travel e-commerce company, we send you a list of our top 10 best travel website creation options each month.
Technology to develop ecommerce websites
We employ a diverse range of cutting-edge technologies to develop ecommerce websites, ensuring a comprehensive and adaptable approach to meet your specific business requirements.
Affordable SEO Agency to Bring Results in Your Business
If you are looking for SEO Services, you will find many options. One can be expensive, or others may offer you cheap SEO packages. Alternatively, you can go with some of the affordable SEO Company. All of these have some bright and darker sides and bring changes to your Business.
You may think about the high-cost SEO packages, which may bring a huge volume to your business. Yes, it is somewhere correct, but sometimes they do not work for small businesses or startups. Else, if you have plans to go with cheap SEO services, it may not give you the results that you want, and it will completely be waste of time and money.
Just imagine the huge difference in price from an expensive SEO Service provider who offers SEO Services for $500 to a cheap SEO service company for just $50. How can they both be the same? Here, we will discuss how to choose the best SEO Company in Delhi, India, which can bring positive results.
What does “Cheap SEO Services” mean? It means something, which is poor quality, less worthy, not the value of money and all. Are you ready to put the future of your business into the hands of such companies? We will not advise you to go with such companies who offer you a cheap SEO service in Delhi, India, or anywhere. SEO involves many methods to follow. Website audit to backlink creation, making it internet perfect to beat the competition and make it top search engines. How can all of this involve 50 or 100 bucks?
We have mentioned some of the points, which will ring a bell for, not to go with the company:
Any SEO agency offering your services between $50-$200 per month.
A website without complete contact information, like phone number, email id, and physical address.
They don’t offer you a single point of contact for all your queries
Not good content or unorganized website.
Not good content or unorganized website.
Do not offer you a custom SEO Package as your requirement, and just stick to their pre-made SEO package.
No pre-work is getting done to understand your business and ways of working.
Poor customer rating, no customer rating or pre-work mentioned on the website.
Companies based in third world countries or counties which are notaries for cyber scamming
Any of the above activities can be an alarming bell for you to get alert.
Do You Need an Expansive SEO Company?
It is easy to search for a company that offers the best SEO services. However, that does not mean it should be expansive as well. Some companies only dream of investing in such services that up to charge $5K per month. Yes, some companies charge this much and promise to promote you to the top. Of course, this may boost your website to the top but really is $5k for a month. It is not at all within reach of many small businesses, startups, entrepreneurs, and even some medium-sized businesses.
The fact, such costly SEO services cannot be suited for all companies. It is only for some of the companies that are earning a lot and can afford to spend some good on SEO. However, is it that only an expansive SEO services company can bring business to you? The answer is NO!! There are many Best SEO Company in Delhi, India who offers you these services at a very reasonable price.
You are not required to spend a five-digit figure to get the best SEO services. An affordable SEO company in Delhi, India can help you to create your brand and bring change to your business. You may need to spend a lot on SEO if you are a big brand, large eCommerce, high growth business, or large publisher to beat a completion. However, for startups or mid-scale of businesses, cheap or expensive SEO, can be wrong.
The midway is the best, which is Affordable SEO services in Delhi, India. Invest as per your business budget, get it customized as needed, and secure a place on top.
To know more about how can SEO help to get business, read the previous blog.
How to Find an Affordable SEO company in Delhi? Are you still confused if a company you have selected is good for SEO Services or not? As the Best SEO Company in Delhi, we have listed some generic questions you can ask an SEO Agency. It will help you to judge if your search ends or not.
Ask questions related to their experience and past work – To begin with, ask if they do local SEO or country-specific SEO. What is the biggest website they have worked on till now based on traffic and website size?
Are they new to SEO Business? – Ask questions like, When a company starts SEO Services? How many SEO projects they have promoted as of now? how many websites currently promoting through SEO Services? What is their current ranking?
Find their ways of working – Find out if their services include social media marketing to target your specific customers, content marketing, and all. Ask what approach they will follow to make you popular, and brand on search engines.
Are you getting a dedicated person to support you with all your concerns? – As stated earlier, if you choose cheap SEO packages, you may hardly get a dedicated person to support you. Sometimes, there is a complete gap between what is going on with your SEO work. But if you are getting someone, make sure to ask about the experience of that person and see some previous work. Ask for a weekly update report on your project.
How much time will it take to make get the first-page ranking – Do not believe the company says that “we will make your top in a month”. SEO is a complex task and needs to be trusted by only selected companies that are known for offering the best SEO services. With most highly competitive keywords, it may take up to a year as well.
Read their customer’s reviews – Check online about their customer’s views. Ask that company for some of the referrals. You will find both, good and bad reviews, and filter out what you basically want to know.
These questions may seem just okay, but their answers can help you to find the best and affordable SEO company in Delhi and anywhere in the world. Thus, you can get the best SEO services at a better price.
Your store needs to be designed with your customers in mind. IOGOOS Solution helping eCommerce industries to boost website and mobile app traffic that makes a purchase, also known as a conversion.
While boosting your traffic can generate more sales, it’s just as important to focus on turning your current traffic into paying customers.
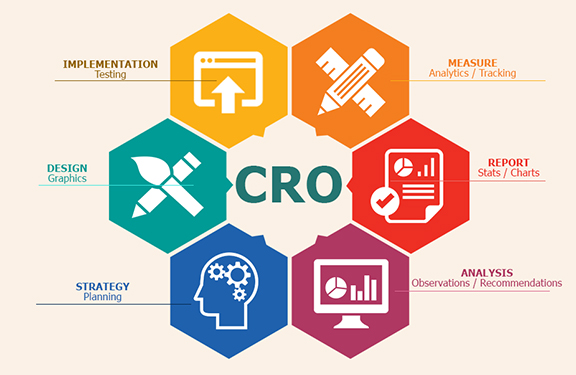
At every step of your customers’ purchasing journeys, there are new opportunities for you to make their paths shorter, easier, and more enjoyable. Through rigorous experimentation and analysis, you can fine-tune your website to push people closer to making a purchase. This process is called Conversion Rate Optimization or CRO.
Conversion Rate Optimization is a technique for increasing the percentage of your website traffic that makes a purchase, also known as a conversion.
Conversions are a big deal. They’re that great moment when a casual visitor to your store finally buys one of your products.
And, on a much smaller scale, conversions are happening all the time leading up to that moment, too.
For instance, a conversion on your homepage might mean having a visitor click through to a product. A conversion on a product page might mean a customer clicking ‘Add to Cart’. Conversions can be entirely dependent on the purpose that a specific part of your website serves.
To optimize your online store for conversions, both big and small, you need to be constantly testing each and every aspect of your website.
Is conversion rate optimization for you?
CRO is a crucial tool for business owners, but it isn’t right for everyone. In order for you to successfully optimize your online store, you first need to have enough traffic to properly conduct a test.
Without the right amount of traffic, your results won’t actually provide any real insight into how your customers are using your online store. To help you determine whether CRO is right for you, let’s take a quick look at its fundamentals.
If you don’t have enough traffic to run an A/B test, focus on getting more visitors to your store instead. Here are some tactics you can use:
The Basics of Search Engine Optimization for Your Online Store
6 Practical and Proven Ways to Drive Traffic to Your New Online Store
How Blogger Outreach Can Help You Grow Your Ecommerce Store
An Introduction to Facebook Ads for Ecommerce
An introduction to A/B testing
One of the foundational elements of CRO is a form of experimentation called A/B testing, also known as split testing.
A/B testing is a way of comparing two versions of the same webpage to see which produces better results. With A/B testing, two different versions of a page are shown to two similar sets of visitors at the same time. Eventually, the version that performs more effectively and produces a larger amount of conversions is declared the winner.
Before you conduct an A/B test, you’ll need to figure out if your website gets enough traffic to generate statistically significant results. If your sample size is too small, you won’t be able to learn anything from your results since they won’t accurately reflect how a larger population is using your site.
If you want to calculate how large of a sample size you’ll need to conduct an A/B test, you just need to drop your current conversion rate for the web page that you’d like to test into this calculator. If the traffic that the web page receives is less than the sample size required for the test, focus on driving more traffic to your website first rather than optimizing for conversions.
Finding the current conversion rate of a single page
To find your current conversion rate, you’ll first need to make sure that you have Google Analytics set up for your online store. With Google Analytics, you’ll be able to figure out the conversion rate for specific parts of your website, including the web pages that you’ll be testing.
Note: This method will just give you a glimpse of your current conversion rate and should not be used for measuring the outcome of your tests. Only use this piece of data for measuring whether or not you have enough traffic to perform a successful A/B test.
The quickest way to find the current conversion rate for specific pages of your website is by using the Landing Pages report in Google Analytics.
To get to Landing Pages, first go to the ‘Behavior’ section and then click ‘Site Content’. In the dropdown, click on Landing Pages. Make sure that the timeframe you’re looking at is the same amount of time that your test will be running. For the purpose of this part of the process, just use the past 30 days.
Now, select the web page that you’d like to test from the list of landing pages. For instance, if you’d like to test your home page, click on www.youronlinestorename.com.
In order to find the conversion rate for a specific goal that occurs on this page, you’ll need to add a secondary dimension to your report. Click ‘Add Secondary Dimension’ and type ‘Second Page’. The ‘Second Page’ dimension will tell us which pages visitors navigated to next and which percentage of visitors to your first page went to those pages.
For an example, let’s say that you’re interested in testing how many people navigate to the products page of your website from your homepage.
To find your current conversion rate for this action, simply choose your homepage as your initial page and then look for your products page under the ‘Second Page’ section of your report. The small grey percentage that’s listed in the ‘Sessions’ section will be your conversion rate for the action.
How to create Conversion Rate Optimization experiments
If your site has enough traffic to perform a successful A/B test, you can start experimenting on your online store.
In Google Analytics, goals are a way of measuring how your website guides visitors to completing a specific task or objective. Goals can be anything: From a product purchase to a newsletter subscription to a simple navigation. By setting up goals for your test, you’ll be able to track and analyze the data behind the decisions that customers are making as they move through your site.
There are five different types of goals in Google Analytics: Destination, duration, pages per session, event, and smart goals. For the purpose of CRO, destination goals and event goals are the ones to focus on.
These types of goals are used for tracking when a specific web page loads and track pageviews as conversion. You can use destination goals for tracking things like purchases or navigation.
If you want to track a purchase, simply set the ‘Thank You’ or order confirmation page as the destination and a conversion will be tracked every time a customer completes an order and is redirected to the ‘Thank You’ page.
To track navigation goals—like someone heading to a collection from your homepage—set the destination as your collection page.
Event goals can be used to track actions on your website that do not necessarily lead someone to a landing page.
For instance, if you want to track someone subscribing to your newsletter or adding an item to their cart, you can set the action of a customer clicking a specific button on your website as an event.
20 CRO Experiments to get you started
Optimizing your online store isn’t a one-and-done solution for ecommerce, it’s an ongoing process that will help you constantly learn more about your audience and how you can better serve them. It’s not a tactic with an endpoint—it’s something that you should always be doing to get better.
There’s no set rulebook for optimizing your website either. Tactics that work incredibly well for one store might have no effect on another. That’s why it’s important for you to start experimenting now, so that you can track your results and figure out how they can help you build a more successful store.
Be sure to keep a list handy of all the experiments that you’re planning on running in the future, so that you’re never without a new idea to explore.
To get your list started, here are some suggestions for different things you can potentially test throughout your online store.
Think about your homepage as a physical storefront. It’s the front window of your store: Capturing attention, igniting curiosity, and pulling people in.
Your home page needs to feel inviting and make it easy for people to enter and navigate your store. It needs to be a visually appealing and consistent experience that works towards achieving a single goal: Get people further into your store so that they can find products they want to purchase.
Just take a look at Province of Canada. For their homepage, they’ve used a large hero image that occupies most of the space above the fold. The copy is simple and straight to the point with a clear call-to-action that pushes visitors right to a collection.
2. Show off coupon codes, real time purchases, and more
As soon as your customers hit your homepage, you have the opportunity to start building excitement and driving them towards your products. If your goal is to get more traffic to your products, there are a bunch of great apps for Shopify store owners that can help drum up demand and incentivize purchasing:
Welcome Bars: Apps like Welcome Header Bar and Quick Announcement Bar let you share sales, coupon codes, promotions and more with your customers as soon as they arrive on your site. These apps add a non-intrusive floating bar to the top of your homepage that will instantly grab your customers’ attention and push them exactly to where you need them to be. Promo codes can be powerful tools: Build.com was able to increase conversions by 6% for their affiliate traffic with a custom promo code.
Popups: Popups and popunders are fantastic for building your email list. Try using an app like Privy or POWr Popup to add a quick popup to your home page offering a coupon code in exchange for a newsletter signup. Email marketing is incredibly effective: According to a 2014 study, 80% of consumers who signed up for emails from a brand over a six month period ended up making purchases based on what they’ve received.
Real Time Purchases: Apps like Yo, Recent Sales Notification, and Notify add a small notification to the bottom corner of your store, showcasing real time purchases being made by other customers. These apps incite a sense of urgency while also giving customers social proof that other people are out there buying your products right this minute. Behavioural psychology researchers at the University of Kentucky report that urgent situations cause people to act impulsively and quickly.
For example, take a look at Atelier New Regime. They’ve used the Free Shipping Bar app to show off their free shipping threshold right on their homepage.
After a few seconds, visitors to their online store also get served this gorgeous popunder encouraging them to join the Atelier New Regime mailing list for access to news and exclusive deals.
3. Add Testimonials to Build Trust
Have you been featured on major publications? Are your products used by any high-profile influencers? Add testimonials, reviews, and badges to your homepage beneath your main content to build trust and project credibility. After all, 88% of consumers trust online reviews as much as they trust recommendations from their friends and families.
Once customers are on your homepage, they need to be able to find the products that they’re looking for and discover new products that they might be interested in.
Your customers need to be able to navigate your website through a well-thought-out search function, smart category design, and engaging ways to discover products.
4. Use intelligent search
If your customers are looking for a product on your website, the chances are that they might not know exactly where to find it.
If your store has a large amount of products, you might want to considering featuring your search bar prominently on your homepage, giving your customers the opportunity to head directly where they want to be rather than digging through categories.
With apps like Findify and Instant Search +, you can power up your search bar with predictive results that help your customers find what they’re looking for. Intelligent search bars suggest results and products as users are typing while taking into account things like spelling errors and alternate product names.
Sigler Music uses the Instant Search + app to help their customers find exactly what they’re looking for. Even after entering just a few letters, the search bar already starts suggesting categories, products, and related results.
5. Organize your categories effectively
For your customers, navigating your website should be easy, simple, and—most of all—obvious. Try to avoid separating your products into too many different categories. Instead, opt for 4 to 6 broad categories that contain more specific subcategories as a dropdown.
Order your categories in your navigation bar based on their popularity, with your most popular category at the front.
6. Take advantage of your 404 pages
Are your 404 pages a dead end? Instead of leaving customers hanging when they hit a 404, try to guide them to other parts of their website that might be more useful. Customize your 404 page to feature links to your most popular collections, products, and promotions.
Instagram is an extremely useful tool for product discovery. Embedding a shoppable Instagram feed onto your website is a great opportunity to inspire your fans with gorgeous photos and show off your products in everyday scenarios.
If you own a Shopify store, you can embed your Instagram feed onto your online store using apps like Foursixty, Like2Have.it, Springbot, SocialPhotos, and Showcase, just like the one above created by MVMT. With these embeddable Instagram feeds, you can promote your top products and link out directly to their product pages, giving your fans a visually engaging way to find new products.
Product pages
Each and every one of your product pages needs to built around clearly communicating the value of your products to your customers. You need to build immersive experiences that cover every aspect of your products while removing any opportunity for doubt or frustration.
As a bonus, include a video that shows your product in action. For instance, if you’re selling t-shirts, add a video to your product page with a model walking around while wearing one of your t-shirts to give customers a better idea of what your shirts look like in motion. Customers are actually 85% more likely to make a purchase after watching a product video.
Bando has some great examples of well-executed product pages. Check out this page for a 17-month agenda, featuring a bunch of high quality photos and a fun, quirky video that really lets the product shine.
9. Be upfront about price, delivery time, and out of stock products
The worst thing that you can do is mislead your customers—28% of customers will abandon their cart if they get charged with unexpected shipping costs. Don’t be afraid to let them know the full extent of things like pricing, delivery time, and inventory. If you do an effective job of selling your products and communicating their value, your customers won’t mind paying a little extra for shipping or waiting a little longer for delivery.
If you own a Shopify store, you can also use apps like Restocked Alerts to give your customers the option to be notified when out of stock products are added to your store.
Positive product reviews can make all the difference in convincing shoppers that a product really works and is actually worth purchasing, along with helping them make more informed decisions in regards to sizing, colour, and more.
Shopify store owners can use apps like Product Reviews and Yotpo to embed customer reviews directly onto their product pages.
Product reviews can be especially helpful for business in the beauty and skincare industry. Beardbrand, for instance, uses Yotpo to showcase reviews on every one of their product pages.
Product page Instagram feeds are specially useful for beauty and apparel companies since they can show your customers how to style your products and give them a better idea of how they look and feel in real life.
To embed Instagram feeds on your product pages, try apps like Foursixty and Like2Have.it.
Checkout experience
The checkout experience is one the final steps of every customer’s purchasing process, so it needs to be as frictionless and flawless as possible to avoid having frustrated customers abandon their carts at the last moment.
At this point in their journey, your customers are display clear intent to make a purchase. You need to make that purchase happen quickly and conveniently without any stress or confusion.
In your Shopify admin, head to ‘Settings’ and then ‘Checkout’.
Under ‘Customer Accounts’, select ‘Accounts are optional’. With optional accounts, your customers will still be able to checkout as guests, but it also gives them the chance to save their information for next time after filling out their personal details.
If you want to invite your current customers to make accounts, you can use the Bulk Account Invite Sender app.
13. Send abandoned cart emails
Unfortunately, customers sometimes fill up their carts with products and then leave your store with no intention of returning. With abandoned cart emails, you can remind those customers of the items that they’ve already expressed interest in and give them a little nudge to return to your store to complete the purchase.
Abandoned cart emails can be set up in the ‘Settings’ section of your Shopify admin. Go to ‘Checkout’ and then scroll down to the ‘Order Processing’ section. You can choose to send abandoned cart emails either 6 or 24 hours after a customer abandons a cart.
You can customize your abandoned cart emails in your Shopify admin as well, so that they fit your brand’s image and tone. Go to ‘Settings’ and then ‘Notifications’. Under the ‘Template’ column, you’ll see one for ‘Abandoned checkout’.
14. Optimize your thank you/order confirmation emails
In the same ‘Notifications’ section of your Shopify admin, you can also customize your Order Confirmation emails.
After a customer has placed an order, there’s still an opportunity to put them back into your purchasing funnel by optimizing your Order Confirmation email to encourage them to sign up for your newsletter, link them to content on your blog, or offer them exclusive discounts and promotions for future orders as a token of appreciation.
Shipping and returns
Even after a customer has gone through the checkout process, you need to remember that the purchase isn’t over until the product is in their hands. Think of how you handle shipping and returns as yet another opportunity to delight your customers and turn all of those one-time shoppers into lifelong customers.
Waiting for a package is an anxiety-inducing experience. Receiving a product that you’re dissatisfied with is even worse. You need to do everything in your power to make shipping and returns enjoyable for your audience.
15. Offer free shipping
Expensive shipping costs can be a huge pain point for customers and potentially hold them back from making purchases. Try offering free shipping to encourage your customers to put in an order, regardless of how far it has to travel. Free shipping can have a major impact on conversions: In one case study by SitePoint, offering free shipping increased conversions by 50%.
16. Have a clear refund policy
It’s no surprise that some customers are hesitant about making purchases online. When it comes to ordering things like clothing, it can be difficult to know exactly how a piece will fit in-person. To help relieve your customer’s concerns, make sure that your business has a clear refund policy so that they know exactly what they can do if they aren’t satisfied with an order.
Although optimizing elements like your homepage, product discovery features, and product pages is crucial for pushing your customers through the conversion funnel, you also need to make sure that your website contains additional information like contact details and an about section.
17. Tell a story with your about page
Your About Page is so much more than a brief summary of your store. It should tell a story to your customers about your products and your brand’s mission. The goal of your About Page should be to build a lifestyle around your products that your audience will want to be a part of.
Try to build a story around both your products and your customers’ relationship with them. Ask yourself questions like: Where did your idea come from? What makes them special? What does an average day in your ideal customer’s life look like?
Endy has a comprehensive About page that sells their mattresses from a number of different angles. At the top, you’ll find a great hero image, a concise summary of their products and what sets them apart, and a link to some customer reviews.
As you scroll down, you’ll see details about their shipping and return policy as well as a charming story about the origin of their name.
18. Create a comprehensive contact page
If your customers want to get in touch with you, they should be able to do so easily. In fact, 44% of visitors will leave a website if there isn’t contact information or a phone number available.
For customers, not being able to share their thoughts and feelings—whether positive or negative—is an extremely frustrating experience. Your contact page should include ways for your customers to reach out when something goes wrong as well as opportunities for them to engage with your brand in fun and exciting ways.
Here’s a quick checklist of everything that your contact page should include:
An email address or contact form
Your physical location, along with a map and directions
Your retail store hours
Links to your social media profiles
Support-specific contact options, including a phone number or email
Website speed and performance
The performance of your website is closely tied to your success as a business. In fact, if a website takes longer than 3 seconds to load, 40% of visitors will automatically leave. That’s a huge amount of traffic that you could be turning away without even realizing.
Imagine you were waiting outside a store and you had to wait for the owner to come to the door to let you in. Sure, you might wait one or two seconds for them to come to the door. But fifteen? Thirty? Try counting those seconds out loud and you’ll soon realize what you could be putting your customers through.
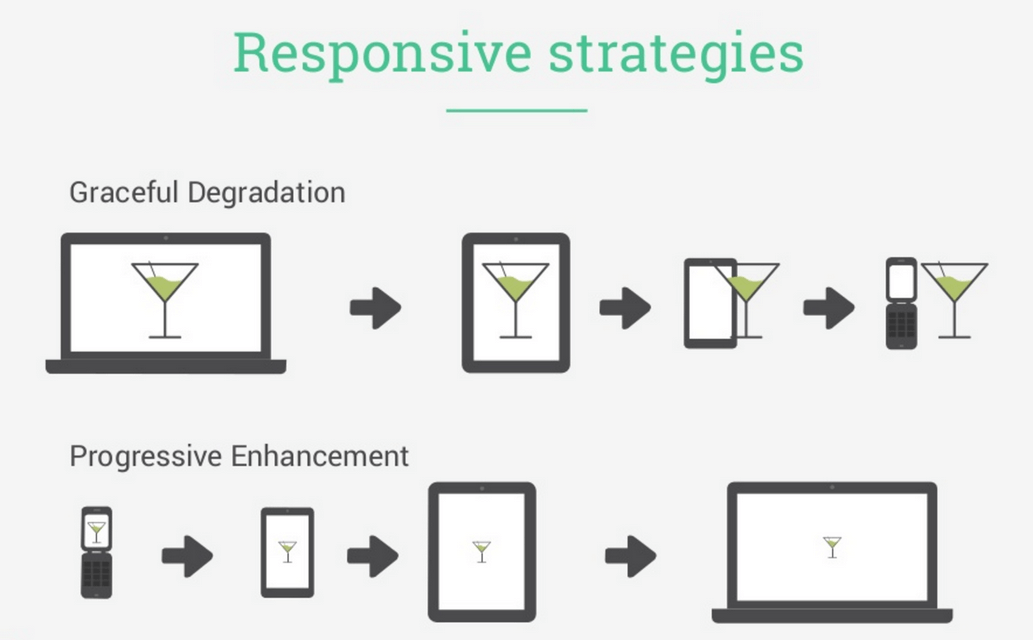
19. Make sure your site is mobile responsive
Being mobile responsive should be a massive priority for your business. In fact, 40% of people will choose another result if the one that they land on is not mobile-friendly. Thankfully, if you own a Shopify store, every Shopify theme is automatically optimized to be displayed properly on every device.
The easiest way to check how long your online store takes to load is by using Google’s Pagespeed Insights tool. Pagespeed Insights will give you a detailed report of how fast your website loads, along with any issues that you can resolve to improve your load times. Alternatively, you can also use load time evaluation tools like WebPageTest and Pingdom.
While optimizing your store’s load times can be a complicated process, there are a couple things to always keep in mind. The size of your images can have a significant impact on how quickly your website loads. Try to compress and optimize every image using a tool like ImageOptim. ImageOptim strips away all of the unnecessary data in every image file, resulting in a much smaller file size with no noticeable visual difference.
Additionally, for Shopify store owners, try uninstalling any apps that you’re no longer using as these apps can still put an additional load on your website even if they’re disabled.
Start your first experiment
Now that you have some ideas, it’s time to start optimizing! Get out there, run experiments, and discover exciting new ways to increase your conversions.
Remember: Always be testing.
Have any more questions about Conversion Rate Optimization? Let us know in the comments below.
You already have it clear. You want to sell your products online. Today we are going to show you the advantages of creating an online store with one of the platforms that are making the most “noise”: Shopify eCommerce Development Services. And we are going to compare it with Laravel web development. From the basic to the most advanced: we will try to decode the comparison. And also guide you to choose the best Shopify Development Company and Laravel Development Company.
What is Shopify’s development?
Shopify is a platform with which to develop an online store and has proliferated since 2006. The speed with which it has penetrated the market is mainly due to the ease it gives the user to have their store ready quickly. The platform includes hosting, and you must buy a subscription directly with them, which means that you cannot install your store on any other server.
It is of no doubt that Shopify is the best platform to create and design algorithm friendly and responsive online store. However, instead of using existing design and templates, it is better to consult with a professional Shopify Development Company. If you are looking for such a professional Shopify web development company at an affordable price, contact IOGOOS solutions. It is one of the best and leading e-commerce development companies. It has professional experience, an expert team of designers and developers, and extended support.
What is Laravel Development?
Laravel is a PHP web framework for the development of web applications or e-commerce apps. It is an open-source and free web framework. For those people, who want to have maximum control and personalization of their web application, Laravel is one of the best alternatives. Taylor Otwell creates it. It follows the MVC pattern to develop web applications. As dictated by its slogan, Laravel is the PHP framework for artisans. If you need customization, Laravel development is ideal.
It would help if you remembered that Laravel development is not as flexible as Shopify Development Services. How and why, we will try to reveal them soon as we progress to the next step: Shopify or Laravel – which is better?
Shopify vs. Laravel – which is better?
Shopify wants to stand out for its ease of use and “create” your store with functions such as “drag and drop.” Besides, Shopify offers you a predetermined template from the beginning of the registration. It is better to choose Shopify web Development Services as it provides hundreds of in-built features. Now selling products directly from your website is possible.
With Laravel, you will need a little more training. But it allows you to personalize your eCommerce fully. If you want the ease of use, Shopify certainly has one more point in its favor than Laravel. If you are looking for customization, then it is Laravel development. Consult with the Shopify experts online, now.
Which is more functional – Laravel or Shopify?
When choosing a platform on which to develop an online store, it is essential to consider the functionality and scalability of the tool, since eCommerce involves the use of multiple payment methods, shipping options, offer management, etc. If you want to gain functionality with Shopify, you have to increase the plans contracted with the company. The basic Shopify plan includes a list of unlimited products and has up to two users. But it does not include processing payments through the platform.
With Laravel, you have access to all the functionalities from the beginning without any extra cost. The only thing that makes Laravel development vulnerable in the competition is that you need to hire a hosting company separately to host the website. Guess what, Shopify already includes it. You are free to sell services/products online across multiple social media sites and marketplaces.
Which one has better performance – Laravel or Shopify?
SEO – A website that does not flow, that does not load fast is a waste of money, why? Because no user will wait to see how your website stacks. You must understand the SEO factors that most influence positioning. So, worry about choosing the platform that allows you to offer your future clients an optimal loading speed.
SECURITY – When you have an online store, you should know that you are handling your customers’ information. So, one issue you should worry about is security. If your website is attacked and your customers’ data is leaked, you will be exposed to a lawsuit, but your reputation will also fall.
These are the two primary factors that a web developer must understand. However, there are other factors too. In this case, Shopify gains positive remarks. Shopify is the ideal choice when it comes to SEO and Security. Why? Although Laravel indeed offers a sound security system, Shopify has more security modules or extensions than Laravel development.
If you want to know more about this topic, consult an expert e-commerce web developer from IOGOOS solutions, one of the leading Laravel Company and Shopify Company.
If you think WordPress is yet another blogging platform, take a quick look at other pages of iogoos.com (right from the homepage). Do you really think we could do this with “Just-Another-Blogging-Software”? Absolutely not!!
Custom Pages, Custom Widgets, Photo Galleries, Portfolio, eCommerce! What, out of these, and even more hasn’t been set up using WordPress.
Only recently, I updated my portfolio with more websites that I had finished, which were not under non-disclosure policy. After adding these projects in my portfolio, I realized that in accomplishing 90% of my work, WordPress plays the role of a CMS. With all the work done so far I am amazed by just how much of its capability I have discovered and how much of it is still unknown to me. Here are a few things that my clients ask when I recommend using WordPress, even for static websites, and what I’ve to say to back my recommendation.
Is it easy to use?
It is The Most Robust and Feature-Filled Platform, which is not only easy to use, but also, very much user friendly. So far all my clients are really happy with the decision to use WordPress as a backend. Moreover, WordPress.tv has made our lives much easier. I refer my clients to this website to learn the features and backend functionality while I am busy creating the best solutions for their requirements.
I need a blog as well…
I guess everyone has realized the value of blogging for their personal and professional web presence by now and most of my clients ask for a blogging platform with a unique and custom website design. It’s really easy to create a few custom pages within WordPress, rather than, creating a WordPress theme that matches the website design. And its really easy to embed WordPress features on these static web pages.
What about Search Engine Optimization?
I am pretty sure you are not new to this term and would want your website to be listed in top search results. With WordPress, you can use plugins like All in One SEO Pack, just to name some, that does most of the work without user intervention. SEO is a wide topic and there’s a lot that needs to be done to achieve good search engine rankings. However, a WordPress installation with a few plugins can help you get there without much hard work. You might want to check a few posts I have written on search engine optimization.
What all WordPress can do?
Honestly, I can’t deny that after using WordPress I haven’t even cared to search for any other CMS. WordPress is an amazing platform which can be customized to create Personal websites, Portfolio, e-Commerce, Galleries and Photo Blogs, Magazine or News websites, Article Libraries and a lot more. If you are comfortable with custom functions and template tags you can actually do wonders with just a single custom WordPress theme.
I don’t know programming?
While creating websites for my clients, I make sure they don’t have to spend their valuable time learning xHTML/CSS to update their websites. I have taken WordPress customization to next level where it provides a separate section in admin area to update the front end of our custom themes. It also has WYSIWYG capabilities where you can update and stylize the content which is not a part of WordPress post or page.
Moreover, these custom functions don’t save any data in core WordPress database tables (wp_options) so there’s no chance it won’t work with any other plugins and features.
Here’s a screenshot of Custom Theme Options I provide to make my client’s life a bit easier.
Theme settings
That’s not all, to add a few more features in the list…
WordPress is Free and Opensource
WordPress is easy to install and upgrade
WordPress is standard compliant
WordPress is Popular (CNET, Ford, ZDNET and various other popular sites has used WordPress as a CMS)
Free support from a vibrant and amazing community of developers and contributors
Huge amount of documentation is available
Plugins are available for almost everything you can think of
I bet no other CMS can compete with this master piece. If you are using WordPress as CMS please drop your website links in comments. Don’t try to spam as a very powerful spam protection plugin (Akismet) comes with its default installation 😀
Web standards are prevailing guidelines used on the World Wide Web to ensure websites and information is accessible to all in the most efficient manner. Most Web browsers have different default settings for the base margin and padding.
This means that if you don’t set a margin and padding on your body and XHTML tags, you could get inconsistent results on the page depending upon which browser your users are using to view the page. A simple way to solve this is to set all the margin and padding on the XHTML and body tags to 0:
html, body {
    margin: 0px;
    padding: 0px;
}
This will keep your design structure in the same place on all browsers.
Borders
You may be thinking “but no browsers have a border around the body element by default”. This is not strictly true. Internet Explorer has a transparent or invisible border around elements. Unless you set the border to 0, that border will mess up your web page layouts. So add the following to your body and XHTML styles:
html, body {
    margin: 0px;
    padding: 0px;
    border: 0px;
}
Here’s a nice and detailed article on CSS Reset: Resetting Your Styles with CSS Reset Stay tuned for more web design tips.
Today we have a quick tip for those who feel depressed and cry when they see the holy grail of CSS in one single line in their website/theme stylesheets.
Recently I started hearing from a lot of people complaining about their theme developers using minified CSS in their themes for maximizing performance without any consideration for their ease of use/customization. People keep asking me if there are tools that convert minified CSS back to normal human-readable form and recently someone even asked me to do a job – normalize some minified stylesheets (of course I didn’t do it and rob him off!)
Whether or not developers should minify CSS when giving out themes/websites has been a subject of debate for a long time but why developers choose to minify some parts of their stylesheets has often been overlooked. Performance issues for larger projects, minifying the reset styles (you don’t have to change them anyway!) and non-developer license are just some of the reasons!
Anyway, coming back to the subject of this post – How can you read minified CSS with ease? (No, we are not going to install any 3rd party software!)
Simply validate the CSS (only the minified part if you have other files attached as well) in question using the W3C’s CSS Validation service!
The output of the validation check is:
whether or not, your CSS validates to standards set by W3C.
Normal, Properly Formatted, and Easily Readable version of your minified/compressed CSS
Do you need to keep the formatted and decompressed CSS? Just copy it from the validation output and replace your version. Voila!